Overview: What is a Time Increment?
The Time Increments feature is useful when monitoring complex operations initiated by a single line in a part program (e.g, canned cycles, step drilling, and multiple hole drilling). During such operations, the CNC may not be able to communicate start and stop monitoring commands to the TMAC. Time increments allow different limits to be applied during different segments of complex operations. Time increments have the following properties:
- The idle value from the first time increment is used as the default idle value for all increments in the sequence. The Idle Reset feature overrides this property.
- The same channel must be monitored for all time increments in a operation.
- Time increments are of a specified duration (excluding the last time increment in a sequence). The duration is determined by the start time of the subsequent time increment.
- Adaptive Control can only be applied to the last time increment in a sequence.
- Start delays are not used with time increments, although the first increment in a sequence may have a start delay.
- For any sequence of increments, the tool, section, and channel numbers are always identical.
- Each time increment starts at a specified point in time during the operation. No two start times can be the same.
- The first time increment always starts at 0 seconds of the operation
- Time increments are only available for primary channel operations
Time increments represent subsections of a continuous operation, with limits and parameters specified for each.
Note: Time increments are not available in Millivolt operations.
Time Increment Editor
TMAC provides an intuitive Time Increment Editor for the creation of time increments. The Time Increment Editor is launched from the Job Editor and utilizes recordings of operations to aid in the creation of time increments. When the time increment editor is opened, the most recent recording is automatically loaded.
Launching the Time Increment Editor
In the Job Editor:
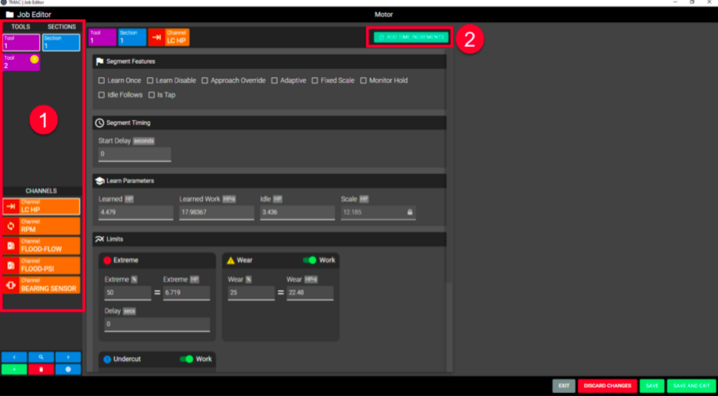
- Specify the operation by selecting the tool, section, and channel from the lists on the left side of the Job Editor. The selected operation is displayed at the top of the Job Editor.
- Click the Add Time Increments button
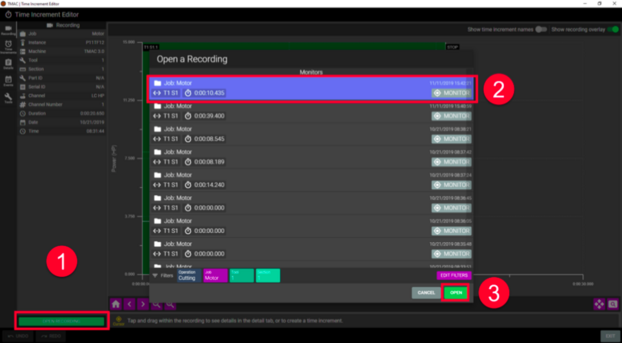
- Select a recording from the list
- Click Open Recording
Using the Time Increment Editor
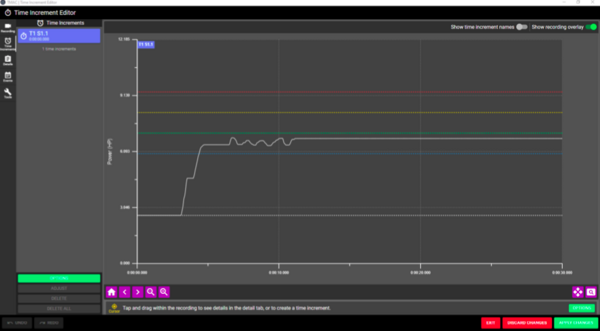
The Time Increment Editor is broken into two major sections: A tool bar and the Recording Viewer. The tool bar provides various data about the operation and time increments added. It also provides several tools that can manipulate the Recording Viewer to aid in creation of time increments.
Recording Viewer
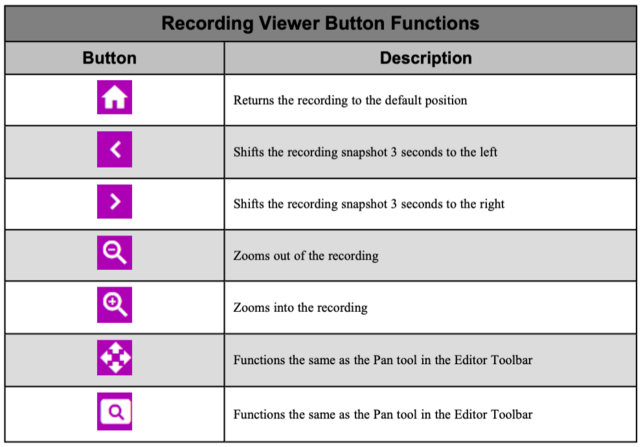
The Recording Viewer portion of the Time Increment Editor offers a graphical representation of the selected operation. The recording of the operation can be manipulated with a set of buttons available at the bottom of the Recording Viewer.
Time Increment Editor Tool Bar
The Time Increment Editor Tool Bar has the following tabs:
- Recording
- Time Increments
- Details
- Events
- Tools
Recording Tab
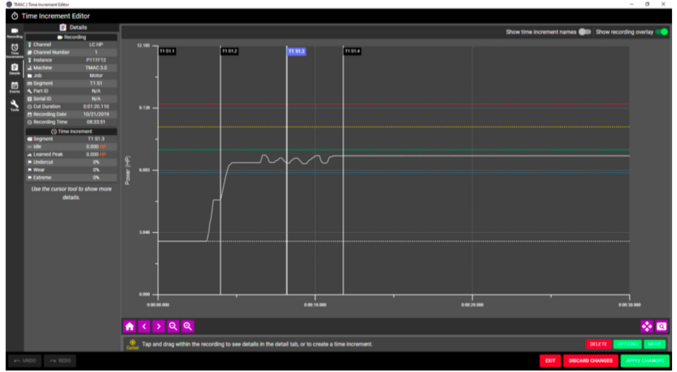
The Recording tab displays specific information about the selected recording. The following information is displayed:
- Job, Instance, Channel and Machine Names l Channel, Tool and Section Numbers
- Part and Serial IDs
- Duration
- Date and Time stamp
In addition to the recording data, a new recording can be opened using the following steps:
- Click the Open Recording button
- Select a new recording from the list. If a large number of recordings populate the list, a filter can be applied to limit the recordings to Learn operations or Monitor operations.
- Click Open
Time Increment Tab
The Time Increments tab displays a list of all time increments that have been added to the operation. Each time increment in the list can be selected. When a time increment is selected from the list, the selected increment is highlighted on the Recording Viewer. In addition, the following buttons become available:
- Edit: Allows the selected increment to be named
- Adjust: Allows the placement of the selected increment to be adjusted
- Delete: Deletes the selected increment
Each time increment in the list is labeled in the following format:
T<tool number> S<section number>.<time increment number>
Additionally, the name (if applicable) and start time of each increment is displayed.
Naming a Time Increment
To name a time increment, use the following steps:
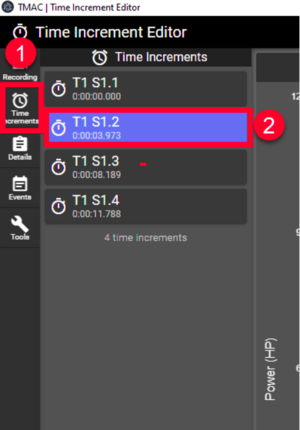
- Select the Time Increments tab on the Time Increment Editor Toolbar
- Select the time increment from the list
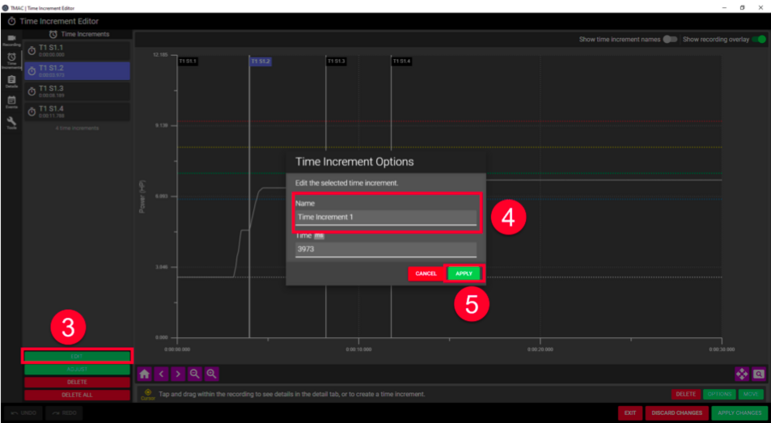
- Click the EDIT button
- Enter the desired name
- Click Apply
Adjusting a Time Increment
To adjust placement of a previously created time increment use the following steps:
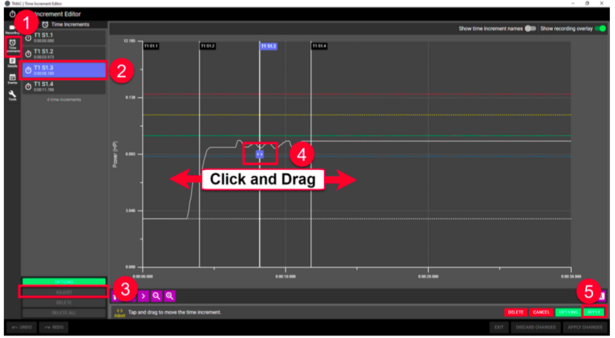
- Select the Time Increments tab on the Time Increment Editor Toolbar
- Select the time increment from the list
- Click the Adjust button (On the viewer portion of the Time increment Editor, a button appears on the designated time increment)
- Click and drag the time increment to a new location on the recording
- Click Apply
Note: The time increment can only be adjusted between the previous and subsequent increments. If the increment needs to be adjusted beyond those bounds, then the other increments will need to be adjusted first.
Deleting a Time Increment
To delete a time increment use the following steps:
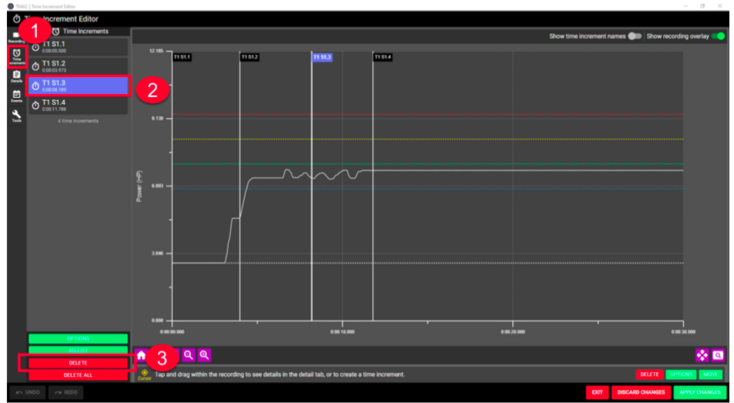
- Select the Time Increments tab on the Time Increment Editor Toolbar
- Select the time increment from the list
- Click the DELETE button
Details Tab
The Details tab provides additional data about the recording and any selected time increment. Additionally, a cursor can be placed by clicking on the recording. Placing the cursor displays additional data including but not limited to channel data, limits and cut time at the cursor location.
Events Tab
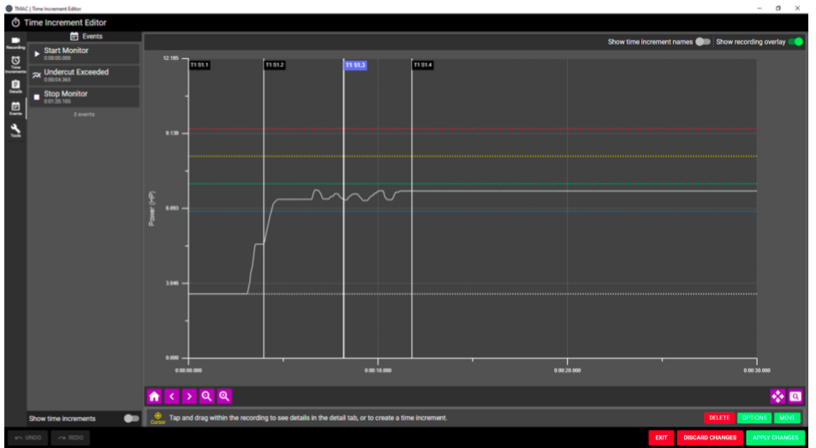
The Events tab displays a list of events including, start monitors, stop monitors, alarms, and custom events. The time at which these events occurred during the operation is displayed below the event name. Additionally when an event is selected from the list, the Recording Viewer snaps to the location of the selected event. This feature makes it easier to locate specific data in long recordings.
Tools Tab
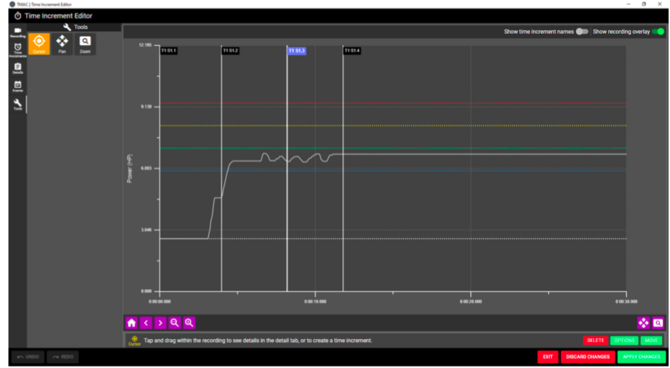
The Tools tab provides access to tools that manipulate the recording. The following tools are available:
- Cursor: Place a cursor on the recording to display cut data or create a time increment
- Pan: Click and drag the recording to a specific spot
- Zoom: Zoom in on a highlighted portion of the recording
Using the Cursor Tool
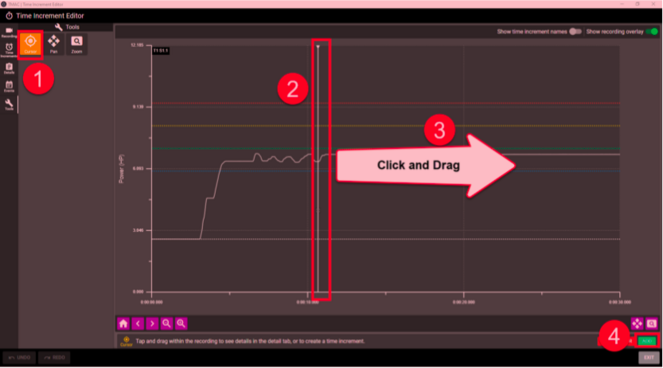
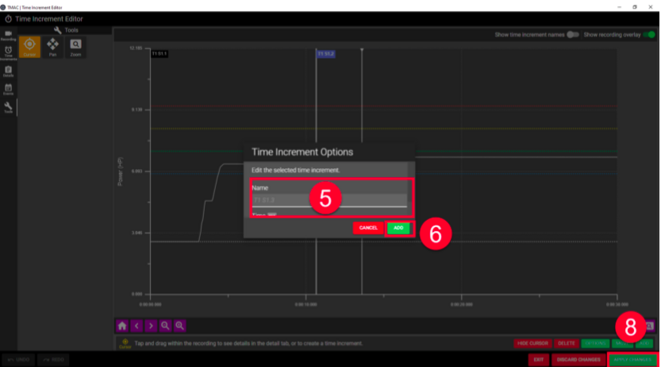
The cursor tool has two functions; viewing information on the Details tab and to create time increments. To view details on the Details tab, select the cursor tool and place a cursor by clicking on the recording. Once the cursor is placed, it can be clicked and dragged to the desired location. To view the details at cursor location, select the details tab. Additionally, the cursor is used to add time increments to the recording. To add a time increment to a recording user the following steps:
- Select the cursor tool from the Tools tab
- Click on the recording to place a cursor
- Drag the cursor to the desired location
- Click the ADD button
- If desired, enter a name for the time increment (optional)
- Click Add
- Repeat steps 2-6 for any additional time increments
- Click Apply Changes
Using the Zoom Tool
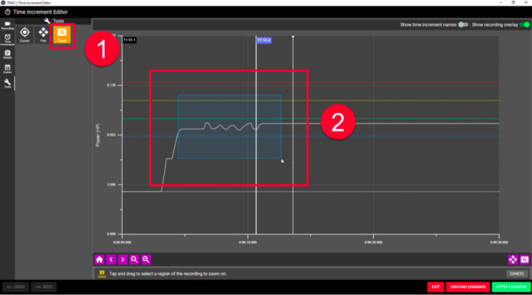
The Zoom tool is used to zoom to a specific portion of the recording. To use the Zoom tool use the following steps:
- Select the Zoom tool from the tools tab
- Highlight the portion of the recording to zoom in on by clicking and dragging on the recording. This draws a rectangle around the portion of the recording.
- Release the click-drag to zoom in on the highlighted portion of the recording
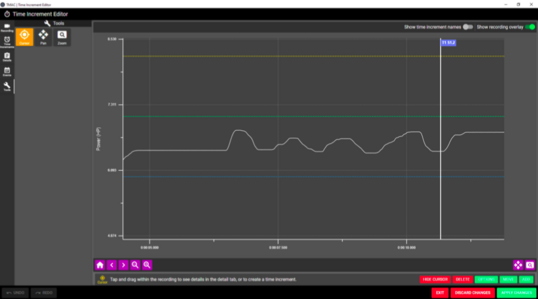
The selected portion of the recording is now enlarged to the size of the recording viewer. This feature aids in placing time increments in more exact locations.
Using the Pan Tool
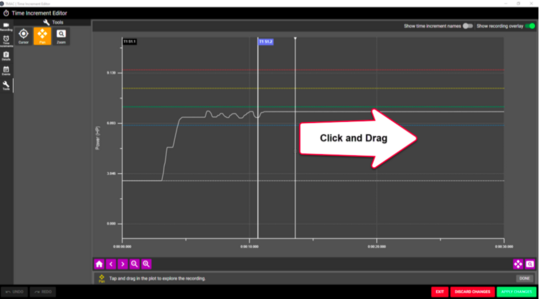
The Pan tool is used to move to specific parts of the recording. After selecting the Pan tool, click on the recording and drag in any direction to scroll the recording. This feature is particularly useful on touchscreens.
